How to Fix Broken Pattern Repeats with Seamless Fixer

Got a pattern that won't tile cleanly? Seamless Fixer is built for exactly that. Upload any flat image with broken or mismatched edges: a Midjourney output, a ChatGPT or Gemini-generated design, or a repeat that's just slightly off. Our AI analyzes the artwork, completes the edges, and blends everything seamlessly, preserving your original design at the center.
What used to mean hours of cloning and masking in Photoshop now takes seconds. No manual edge work, no guesswork.
In this tutorial, we'll walk you through how to use it, cover the advanced controls, and get your design print-ready.
⚠️ Note: If you’re starting from a photo, fabric scan, vintage swatch, or reference image and want the AI to rebuild it into new seamless pattern options, try our From Image tool instead. It’s ideal for scans and photos, and can reinterpret the source while preserving its overall color, style, and feel.
Step-by-Step: How to Fix a Seamless Pattern
1. Upload your image
Click to upload or simply drag & drop your file. For best results, we recommend starting with a square image (1024 × 1024 px is ideal).
This is the image that will become your final repeat pattern — so choose something with a clear aesthetic or theme, even if the repeat is broken or incomplete. Seamless Pattern Fixer is made to fill in the gaps.
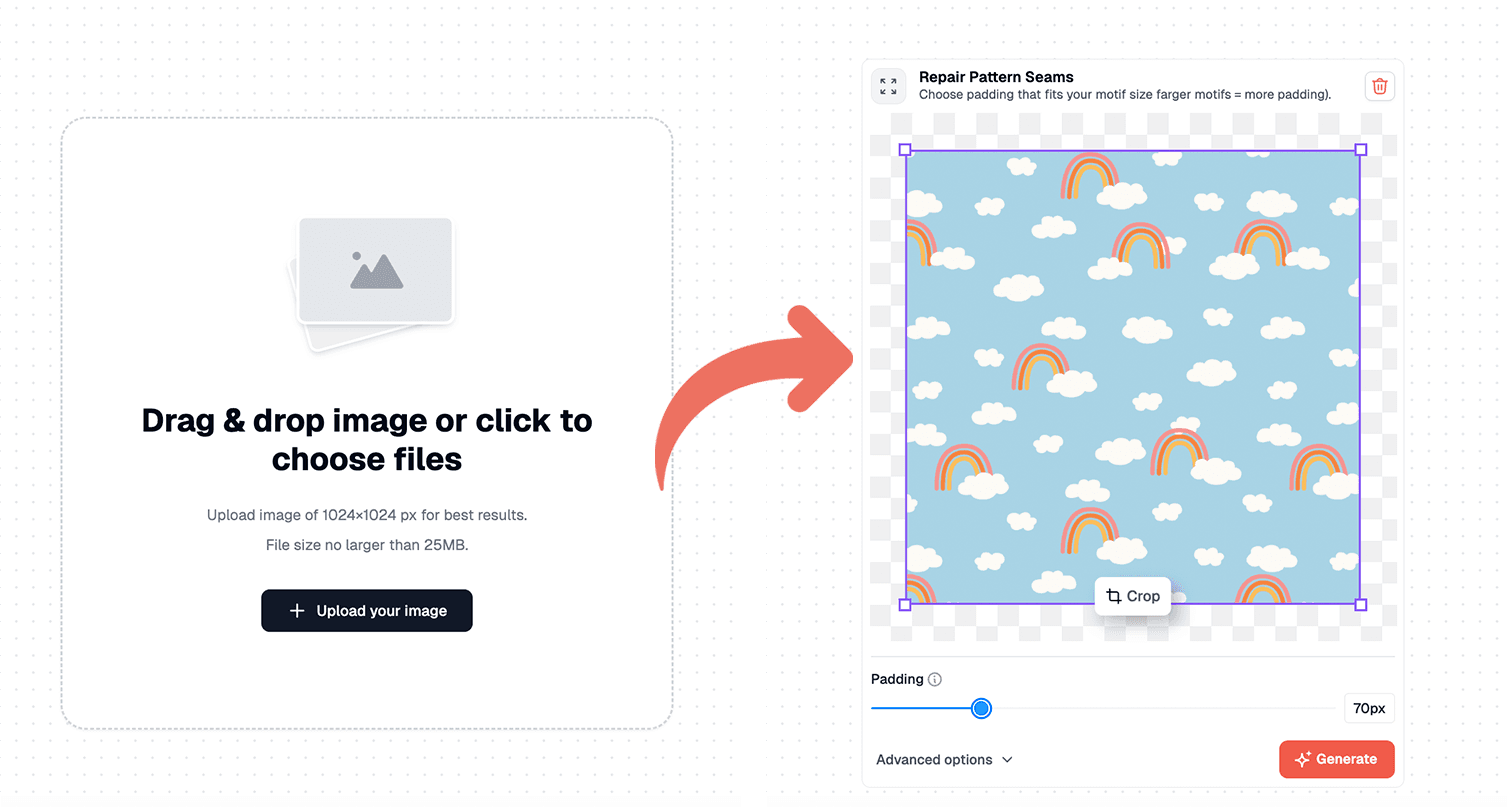
2. Choose your padding
Padding determines how much space the Seamless Fixer has to work with when completing the repeat. The larger the motifs in your design, the more padding you’ll need.
Tip: A good rule of thumb is to make the padding on each side roughly half the width of your largest element.
If your motifs are small and closely packed, a smaller padding will work just fine.
3. Fine-tune your results (optional)
There are two toggles available for extra control:
Style Match
Increase this to help the generated sections better match the visual style of your original image. We recommend keeping it in the 0.3–0.8 range for most designs.
Blending Strength
Controls how smoothly the new areas blend into the original. Higher values eliminate seams and help with colour consistency. If you reduce this to 0, you may notice a visible difference between the edges (new elements) and the centre (your source image). This can be a creative choice but otherwise we suggest keeping it high.
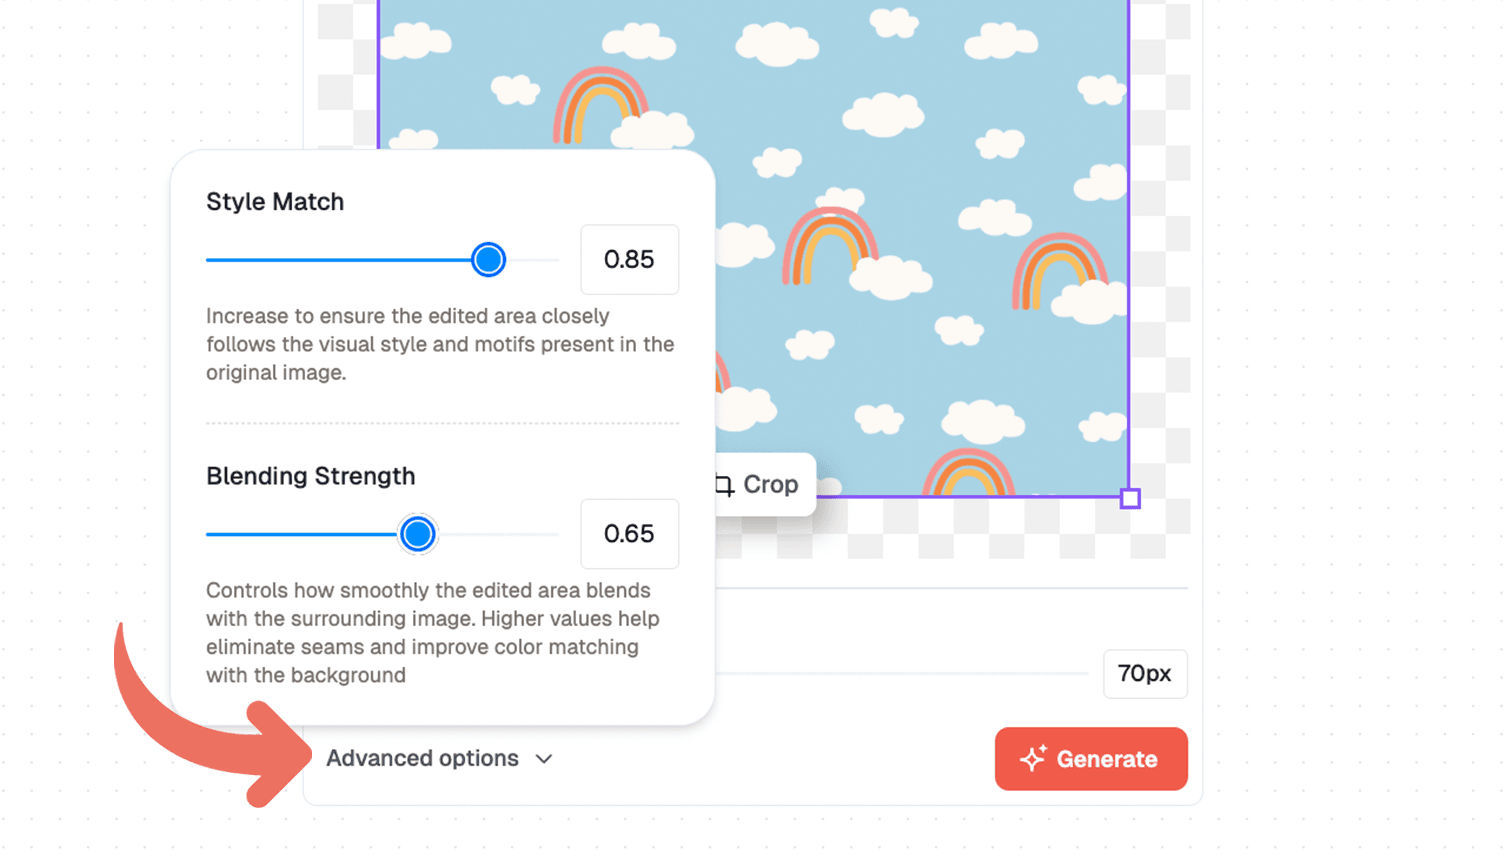
🎨 Want a new variation based on your original?
Lower both Style Match and Blending Strength to create a subtle new interpretation of your design. The colour palette and motifs may shift a little – perfect for exploring ideas around a theme.
4. Click Generate
Once your settings are ready, hit Generate. You’ll receive four unique versions of your pattern.
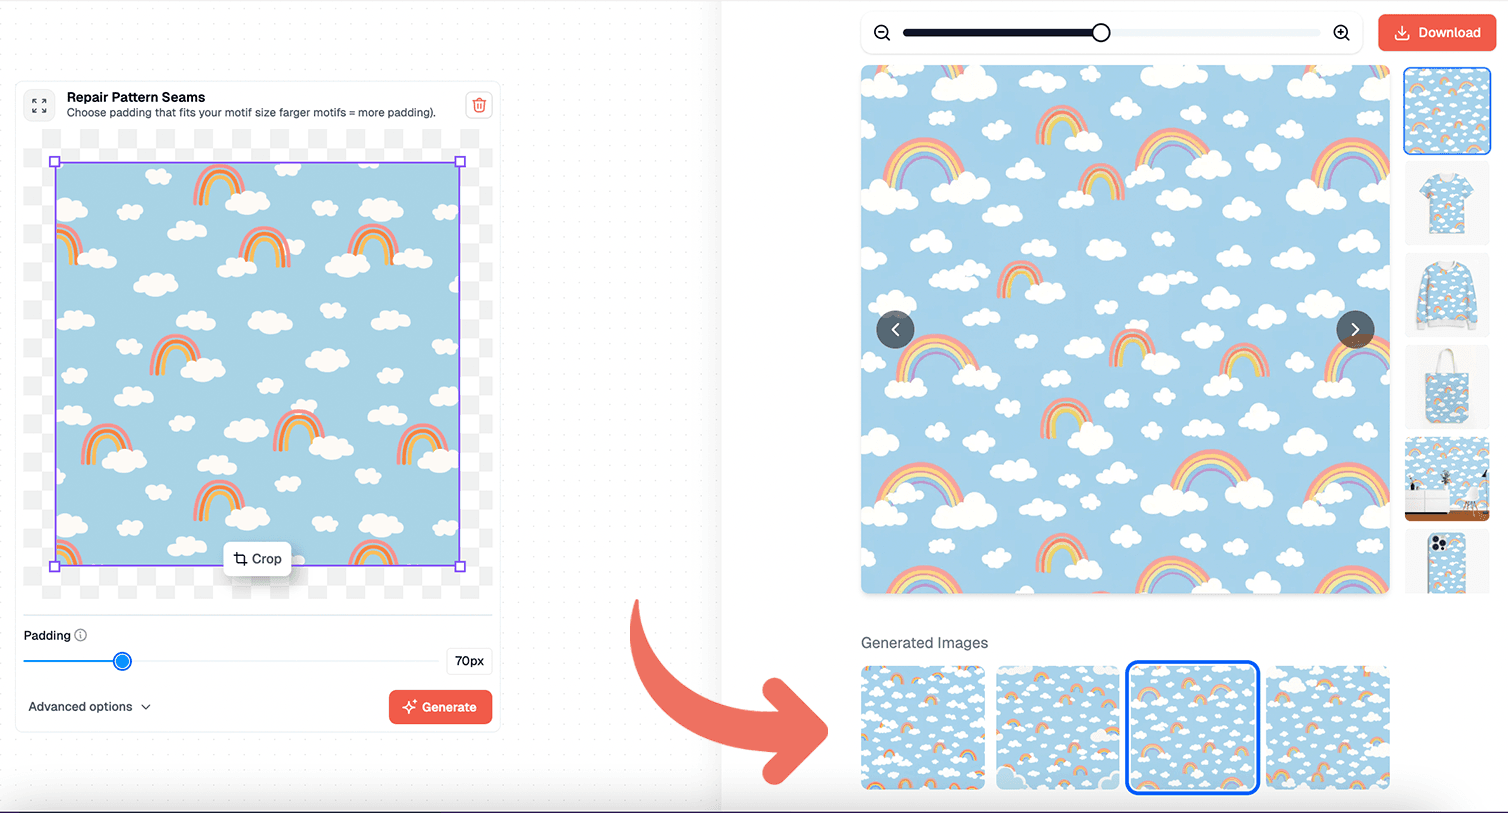
We recommend zooming out to get a better sense of how the tile repeats. You can also preview your designs on real-life mockups like fashion garments and accessories to see how the pattern will look on a product.
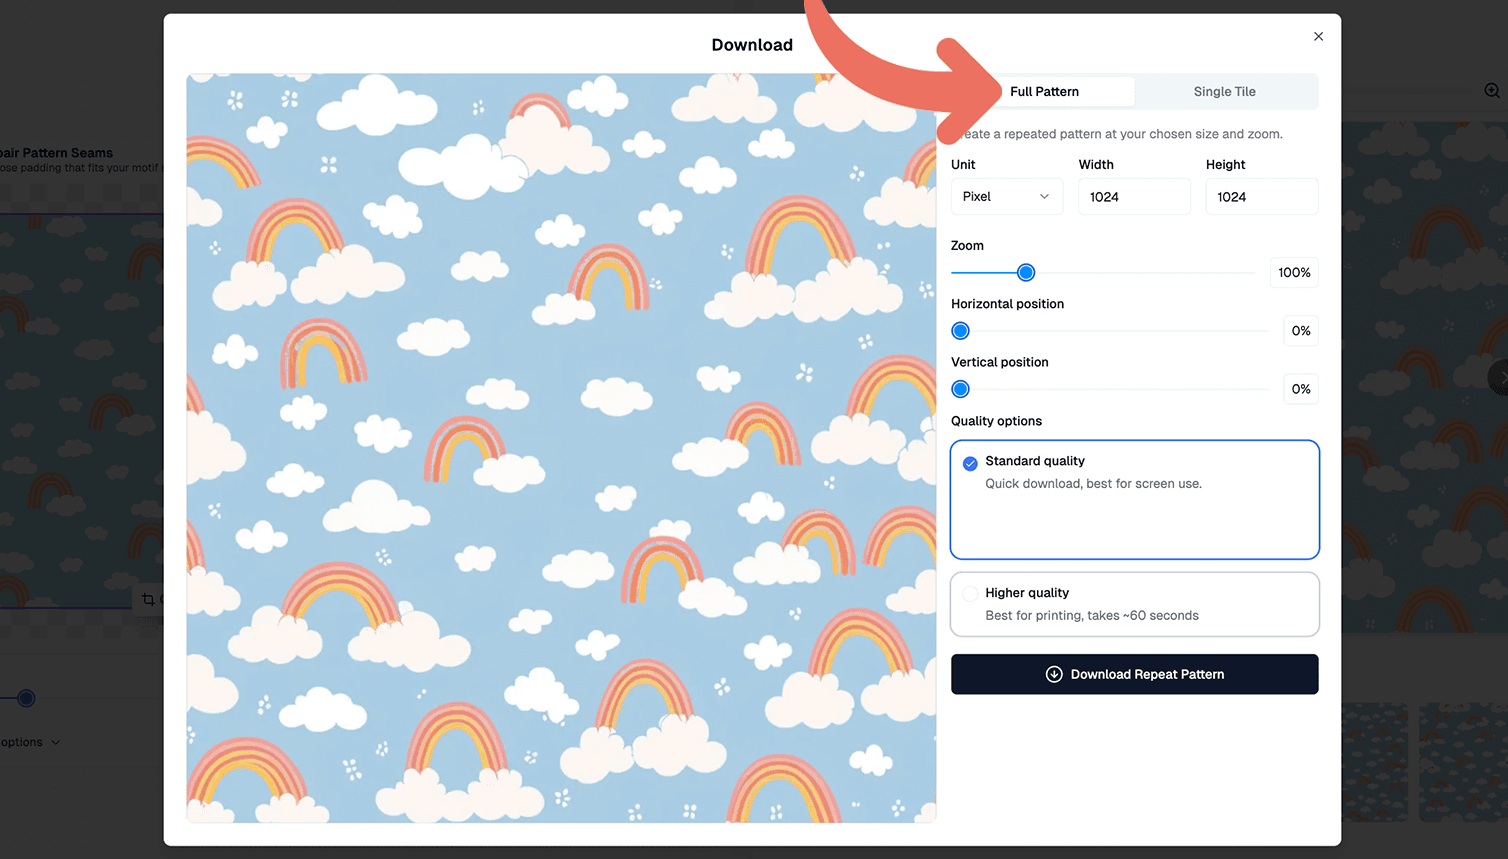
Exporting Your Final Pattern
When you’re happy with the result, it’s time to download your pattern. You’ll see two options:
Download Full Pattern
If you know the exact dimensions of your product (for example, a cushion, tote bag, or notebook cover), download the full pattern. First, enter your dimensions (in pixels or inches). Second, adjust the scale, and tweak the horizontal and vertical position if needed to get the placement just right.
- Standard quality is great for small digital prints or mockups.
- Choose high quality for anything headed to physical production.
Download a Single Tile
This is the go-to choice for manufacturers or when you need a repeat-ready design. One tile can be repeated infinitely to create fabric, wallpaper, or wrapping paper.
- Standard quality works well for smaller items like phone cases or social media assets.
- Choose high quality for print production (e.g. fabric rolls, wallpaper).
That’s it! Your pattern is ready for production
With Seamless Pattern Fixer, you can covert any image into a perfectly tileable pattern with just a few clicks. So go ahead – explore, experiment, and bring your vision to life.
Try Seamless Fixer!
Need more help? Check out our full library of tutorials.
Happy creating!