AI Pattern Mockup Creator: Preview Your Designs on Products

Presenting pattern work to clients or preparing listings for an online store both come down to the same challenge: showing how a design actually looks on a product, without the time and cost of a physical sample or a Photoshop deep-dive.
Pattern Mockup Creator (Preview on Products) solves that directly. Choose from an extensive library spanning fashion (t-shirts, hoodies, leggings), home décor (pillows, wallpaper, mugs), accessories (tote bags, phone cases), and packaging and visualise your pattern on a professional product shot instantly. No templates, no stock photo hunting, no manual masking.
In this tutorial, we'll walk through how to use the tool across a range of product categories, with examples showing what's possible straight out of the generator.
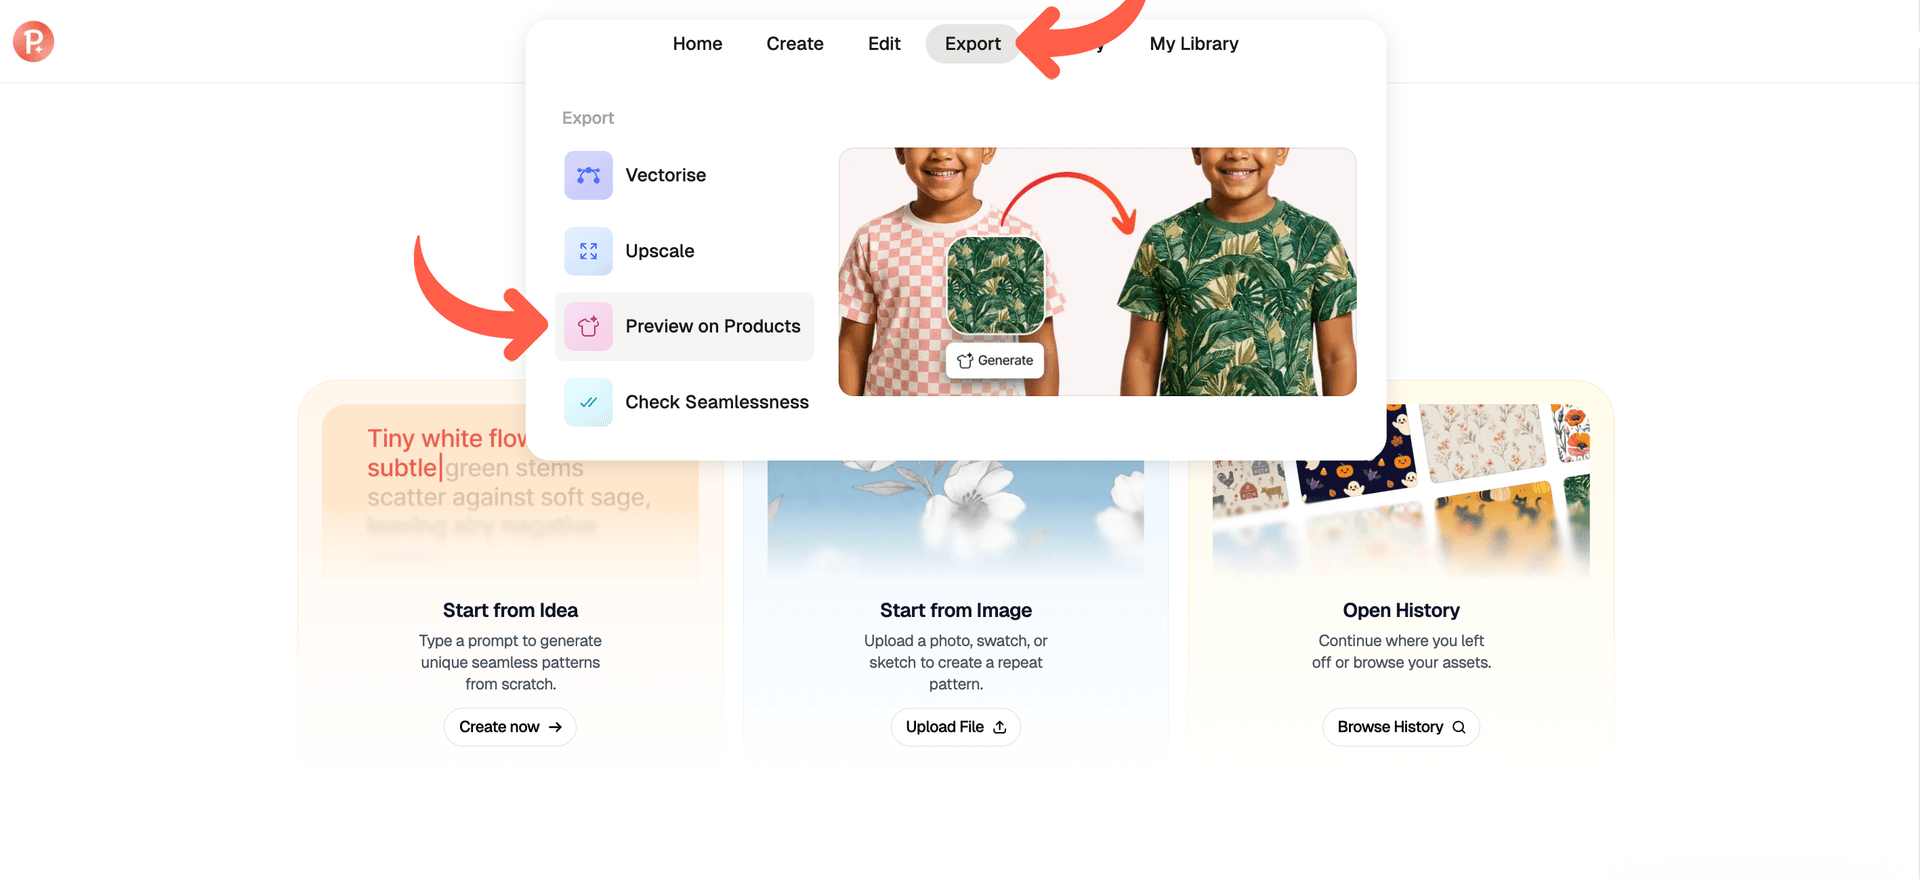
Open Design Tools app and in the navigation menu and select Export - Preview on Products.
Step 1: Choose Your Product
Once you're in the Mockup Creator, you'll see a comprehensive gallery of mockup options. Browse through the available products or use the category filters to narrow your search:
- Fashion - t-shirts, sweatshirts, hoodies, pyjama sets, leggings, Hawaiian shirts, baby bodysuits and bibs, swaddle blankets, flip flops, and summer dresses
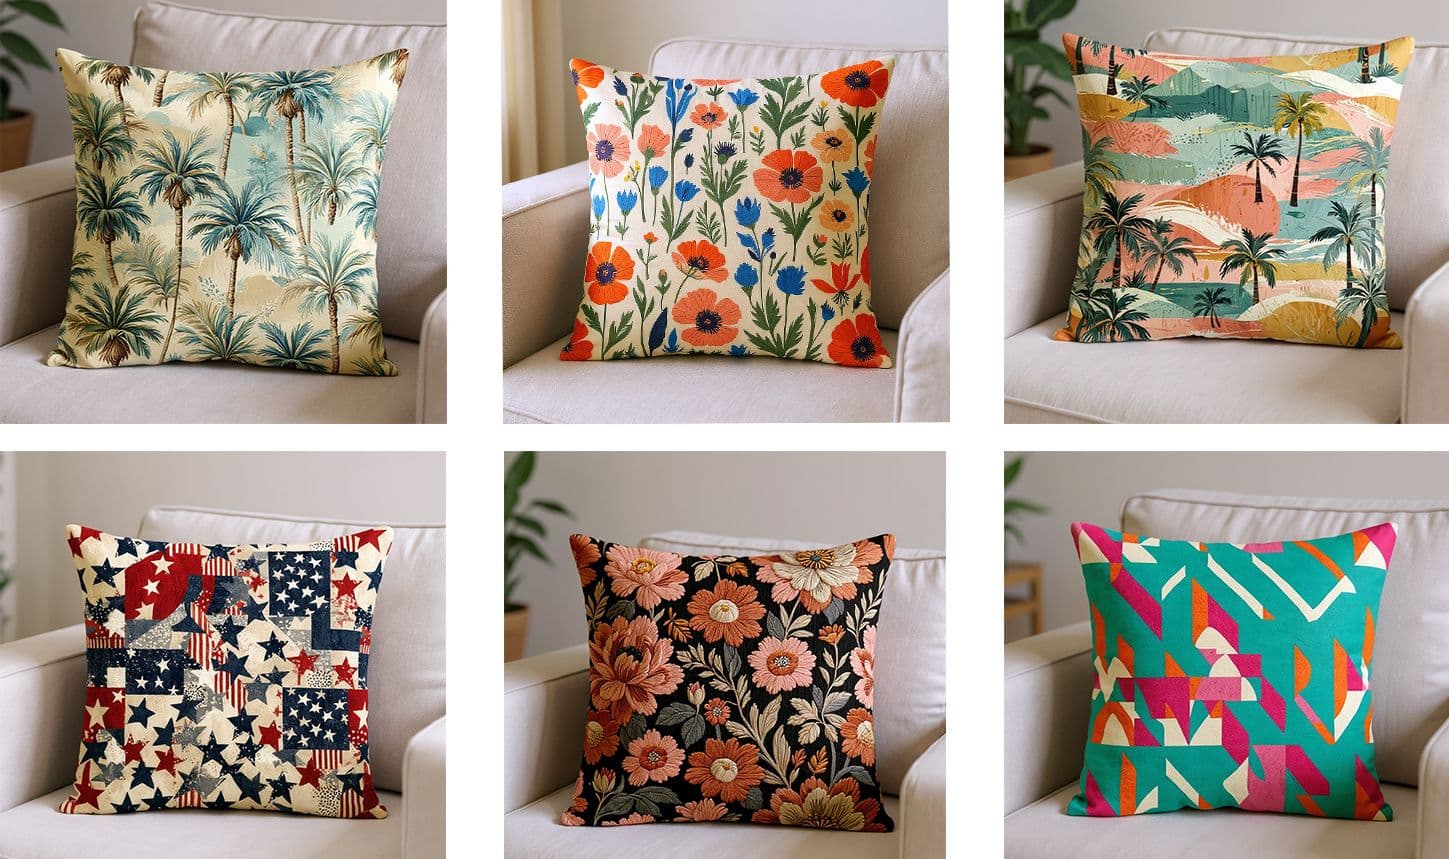
- Home Décor - throw pillows, wallpaper, curtains, lamp shades, rugs, bath mats, bedding, beach towels, kitchen towels, plates, mugs, and shower curtains
- Stationery & Packaging - shopping bags, takeaway coffee cups, washi tape, pencil pouches, cream jars, shampoo bottles, spiral journals, and wrapping paper
- Accessories - tote bags, backpacks, baseball caps, bucket hats, reusable bottles, sleeping masks, scrunchies, yoga mats, pouches, phone cases, mouse pads, and laptop cases
Click on the product that best fits your vision to select it.
Step 2: Upload Your Pattern
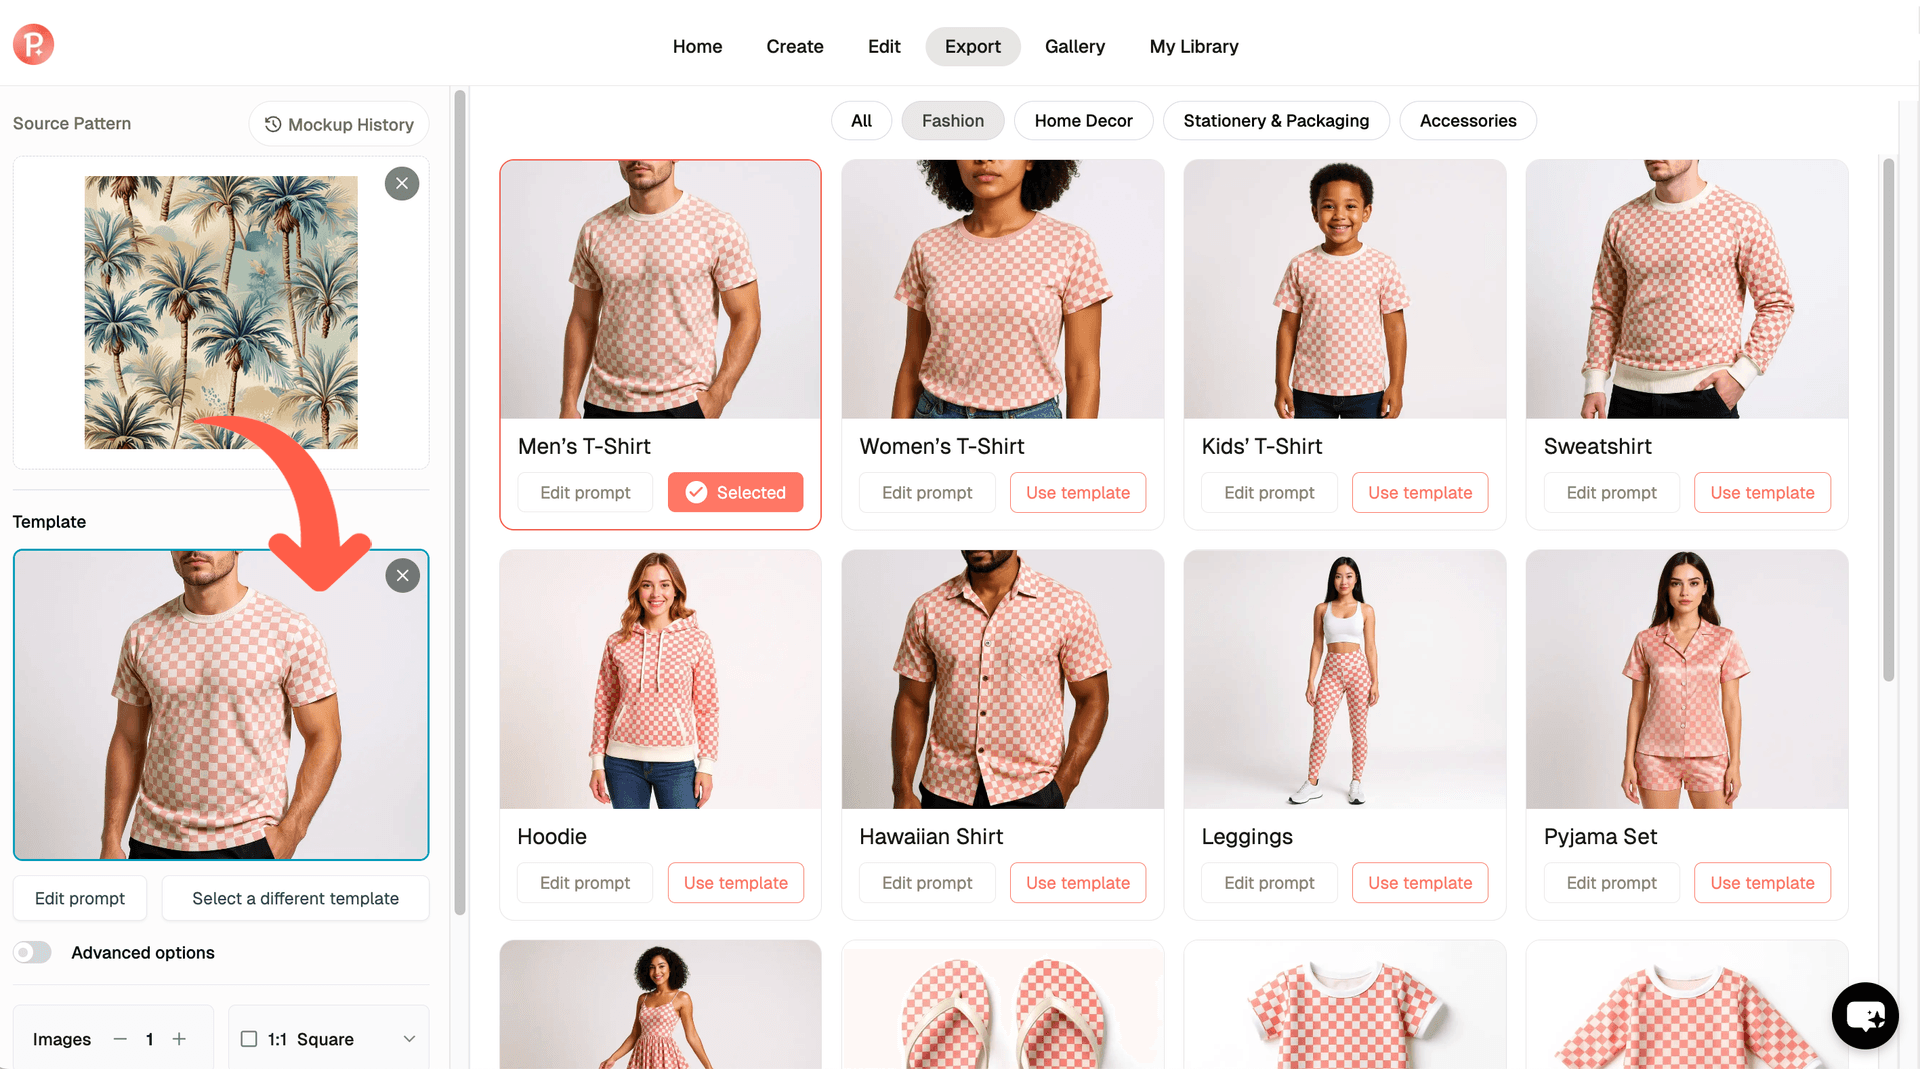
After selecting a product, upload the seamless pattern you want to visualize. The tool automatically applies your pattern designs to the chosen mockup template.
Important note: If you want to quickly visualize a design that isn't seamless yet, you can upload it to test the concept and then perfect it later using our Seamless Fixer tool to create a properly repeating pattern.
Step 3: Set Your Preferences
Before generating your mockup, customize your output:
- Number of images: Choose how many variations you want to generate (selecting 2-4 gives you multiple options to compare)
- Pick the image ratio based on where you'll use the mockup:
1:1 Square - Perfect for Instagram posts, Facebook feeds, and square product thumbnails on e-commerce platforms
16:9 Widescreen - Ideal for YouTube thumbnails, website banners, presentation slides, and landscape-oriented social media posts
9:16 Portrait - Optimized for Instagram Stories, TikTok, Pinterest pins, and mobile-first content that fills vertical screens
3:4 Portrait - Great for traditional product listings on Etsy, Amazon, and Shopify, as well as standard portrait photography formats
3:2 Landscape - Classic photography ratio that works well for blog featured images and horizontal product displays
2:3 Portrait - Another versatile portrait option for product catalogs, print materials, and e-commerce detail shots
4:5 Portrait - Instagram's recommended ratio for feed posts when you want maximum vertical space without going full-screen
Choose your ratio strategically based on your primary platform.
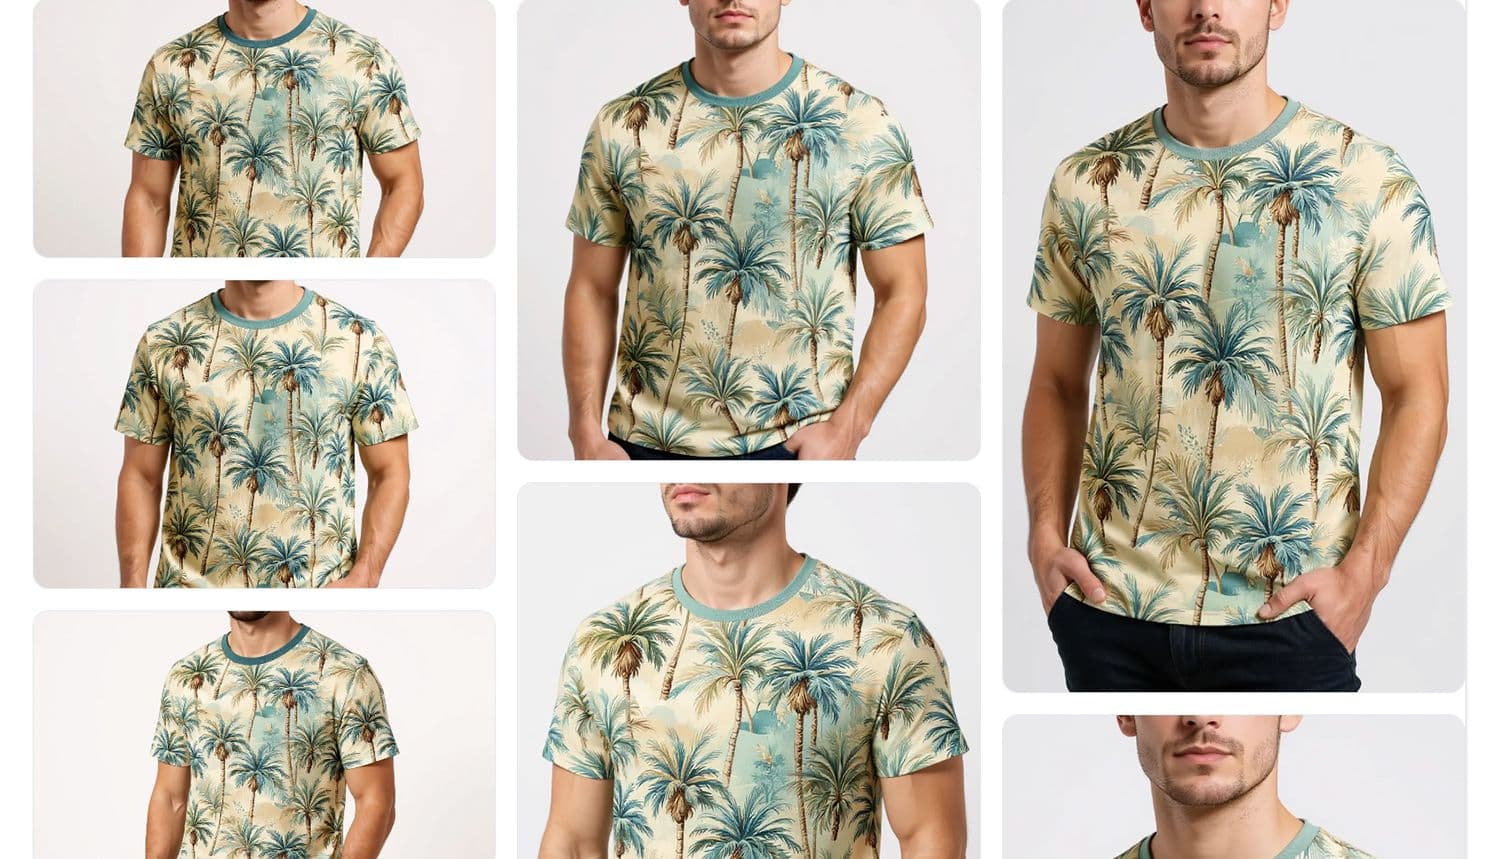
Step 4: Generate Your Mockup
Click Generate Mockup and wait a few moments while the AI creates your product visualization. You'll receive your selected number of mockup options, each showing your pattern applied to the product in a professional setting.
Step 5: Download or Refine
Review your generated mockups and either:
- Download the image if you're satisfied with the result
- Edit and regenerate if you want to make adjustments
Important: All generated mockups are stored in your history for 30 days. Make sure to download any images you want to keep before this period expires, as they will be automatically deleted after 30 days.
Advanced Customization Options
Want more control over your mockups? Click Advanced Options on the left panel or Edit prompt below the product image in the catalogue to reveal the AI prompt used to generate your image. Here you can modify specific details such as:
- Background settings (studio, outdoor, lifestyle settings)
- Product colors (straps, zippers, additional colors)
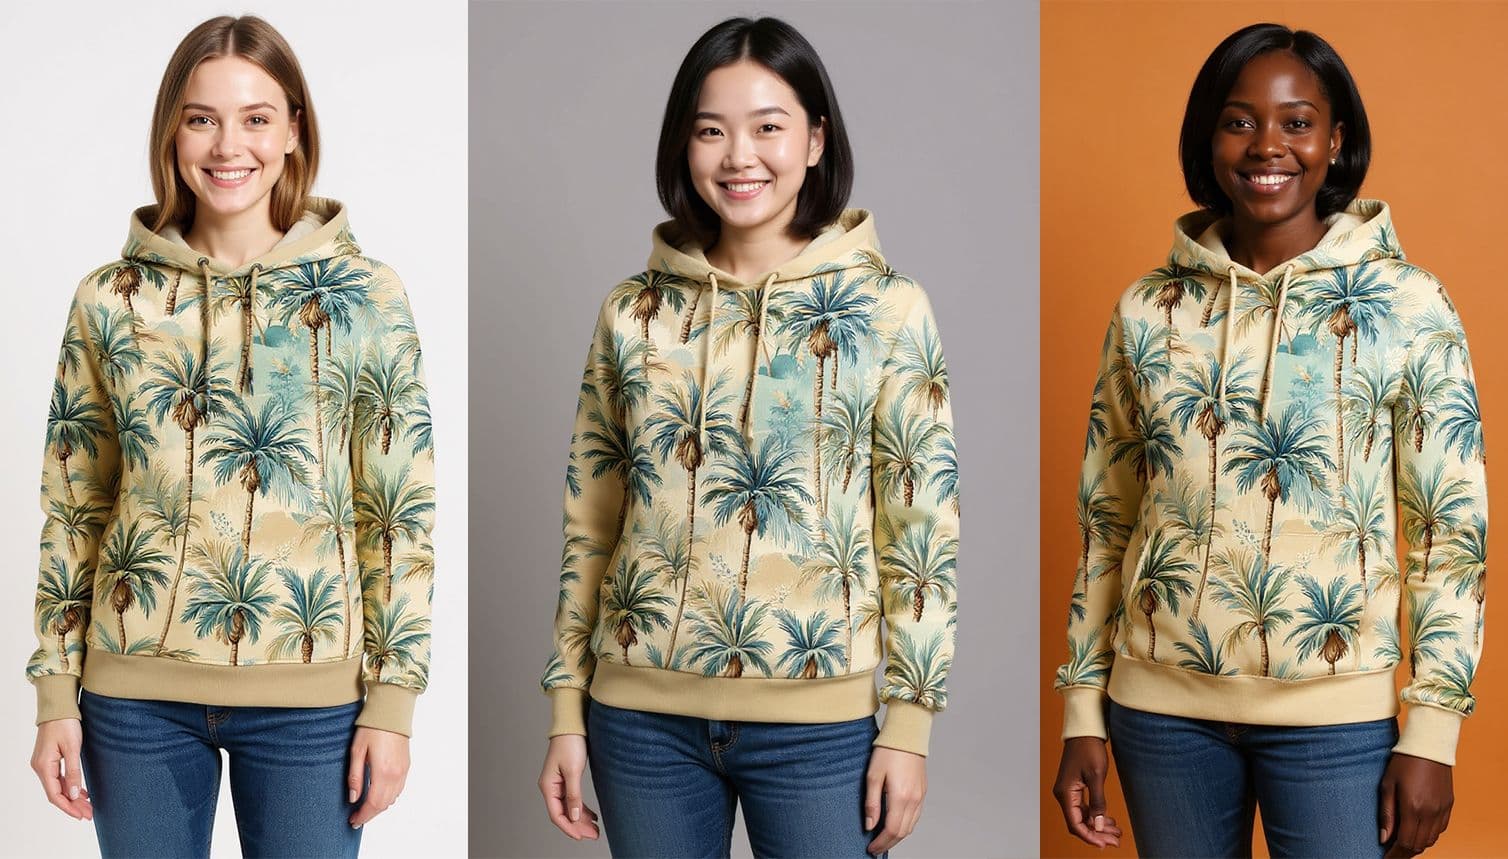
- Product variations (different models, angles, or styles)
- Model appearance (age, gender, ethnicity, and styling)
- Lighting and composition elements
You can also create completely custom mockups from scratch by describing your ideal product visualization in the Advanced Options prompt field.
Use Cases for the Pattern Mockup Creator
- E-commerce Listings
Create professional product photos for your Etsy, Shopify, or Amazon store with AI without expensive photoshoots. Generate multiple angles and settings to give customers a complete view of how your patterns look on finished products.
- Design Testing and Iteration
Before committing to production, visualize how your patterns work on different products. Test color combinations and product applications quickly and cost-effectively.
- Client Presentations
Impress clients by showing them exactly how their custom patterns will look on real products. Create mockups for pitches, proposals, and design approvals that make your concepts tangible and appealing.
- Portfolio Development
Showcase your pattern design skills with professional mockups that demonstrate versatility. Display the same pattern across multiple products to show its commercial potential.
- Social Media Marketing
Generate eye-catching visuals for Instagram, Pinterest, and other platforms. Create carousel posts showing your pattern on various products, or use mockups to promote new designs and collections.
- Market Research
Test consumer interest by sharing different product mockups on social media or with focus groups. Gauge reactions before investing in inventory or production.
- Print-on-Demand Products
Perfect for creators using print-on-demand services. Generate mockups that match the products you'll actually sell, creating consistency between your marketing materials and final products.
The Pattern Mockup Creator removes the traditional barriers between design and product visualization. What once required photo shoots, physical samples, or expensive mockup services can now be accomplished in minutes with just a few clicks. Whether you're an established business streamlining your product photography workflow or an independent creator building your first collection, this tool provides the professional imagery you need to succeed in today's visual marketplace.
The ability to customize prompts and generate multiple variations means you're never locked into a single vision: experiment freely, iterate quickly, and create the perfect representation of your designs. Start exploring the Pattern Mockup Creator today and transform your seamless patterns into compelling product visuals that drive sales and engage your audience.